I'm pretty much a money saving, budgeting freak of nature.
I've followed Dave Ramsey's Envelope System since I was a teenager.
Seriously, what teen has a budget.
That's right, I did.
But Real life, Real world, Purses & Envelopes don't work really well.
I can only imagine the purse disaster I would have if I tried carrying 6-10 envelopes around with me.
So I went to Wal*Mart a while back and bought a coupon organizer
I put all my little categories in it
(You can see it's been well used, the sticky is coming off the stickers!)
And it has worked very well,
Except for that I have to open up my "money wallet" to get the cash,
and then dig out my real wallet for change.
Not effiencent when the cashier is trying to get you out of the way.
It also took up extra room in my purse.
But I really don't like the Dave Ramsey Wallet,
It's just not for me.
So today while I was sitting at work,
I Devised a solution to my problem.
PAPERCLIPS!
PAPER!
TAPE!
I'm a flippin genious.
Now I can keep all my money,
seperated into catagories,
in my wallet!
The Mr. suggested I just get different colored paper clips,
but I can just see the following scenerio transpiring....
Me: I'm fairly certain that the RED paper clip is for Groceries,
and the BLUE paper clips is for eating out.
Mr.: No, I'm pretty sure you have that backwards.
Me: Ok, if you say so. SWEET! We have ALL this money to go out.
The next week:
Mr: Where's my lunch??
Me: Oh yea, we got the colors mixed up. Sorry babe, we have no food until our next check, we used it all when we went out.
Ok so I'm probably exaggerating the problem just a little bit. There is a fairly huge difference in our eating out money and our grocery money. But you get the idea!
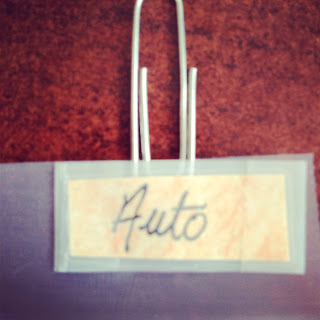
So Find a pretty colored paper that you like.
I just used this orange sticky note paper that we had in the office,
It was 1 cut instead of 4.
I'm all about easy people.
Write what ever category you want on it
I used tape to "laminate" it so it was more sturdy.
Then get your paper clip. I used little paperclips for things that don't collect many bills, and large ones for categories that do.
Lay the paper clip down, so that the little loop is on the bottom.
With your finger nail, gently pull the little loop down,
but be careful not to bend it!
Take a piece of tape and slide it between the little loop and the big loop,
with the stick side on the big loop side.
You don't want it too far up the paper clip,
because you won't be able get your label to stay.
Put your label on the tape, word side up.
Fold the tape over the bottom of your label to give it some extra support
Cut around the edges to your liking!
Voila!
So it might not be the cutest thing ever.
I think I actually just conviced myself to redo this with colored paper,
And cute cutout designs
and maybe get some real laminate,
but for right now it works great!
AND I have more room in my purse,
Mission Accomplished!


No comments:
Post a Comment
I would love to hear from you! Leave me a comment below!